
As an Amazon Associate I earn from qualifying purchases.
For some reason, I can’t help but collect odd knives. Useless knives some would call them.
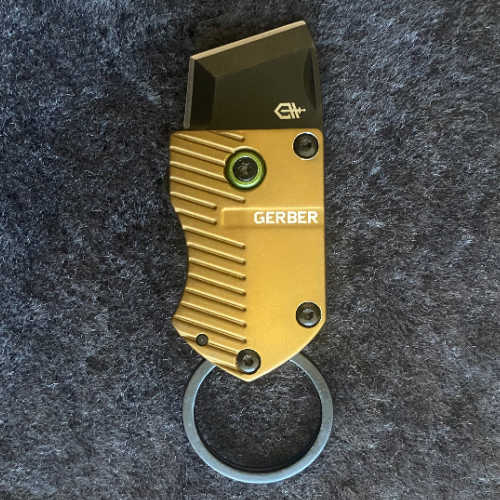
Whatever the reason, my collection (which includes the CRKT CEO and the Spyderco Bug) continues to grow, and even gained a new member a couple of weeks ago, the Gerber Key Note.
![Gerber Key Note, Compact Fine Edge Scraping & Cutting Knife, Coyote Brown [30-001692]](https://m.media-amazon.com/images/I/51ew7kuQV4L._SL500_.jpg "Gerber Key Note, Compact Fine Edge Scraping & Cutting Knife, Coyote Brown [30-001692]")
The Key Note is a keychain (albeit a bulky one) that has a unique blade. Not necessarily in style but in length. The 1″ blade is really just the business end of a Tanto blade.
Its shape, however, makes it useful for both cutting and scraping tasks. You can even cut up an apple with it if needs be but I wouldn’t want to do that again.
As it’s on the chunky end for a keychain knife I’d have to say that you’ll need a compelling reason to pick up one and carry it on your keys. Because of its overall width, it feels pretty much like a full-size knife in your pocket or with a pocket clip.
While I don’t know that I can convince you to get one, I can give you my impressions and remind you that it’s less than $30…
First Impressions
The knife is a bit lighter than you’d expect at first sight (aluminum scales help keep the weight down).
It also feels quite front-heavy in the hand and is a bit hard to balance as it doesn’t have much grip space.
However, the fit and finish seem fine and the texture of the scales is quite nice, not too slick and not too rough.
Quick Review & Use
Using the knife isn’t awkward per-say but it’s definitely different. I carried the Key Note for a couple of days at work and around the house and it saw all kinds of use.
The main thing is that nearly all of the cutting is done via the blade’s middle point as using the actually slicing face of the knife takes a second to orient the knife correctly.
The knife is supposedly almost meant to be useful for a scraping motion but I didn’t have the chance to try it out and I’m not sure who goes around scraping things with their pocket knife.
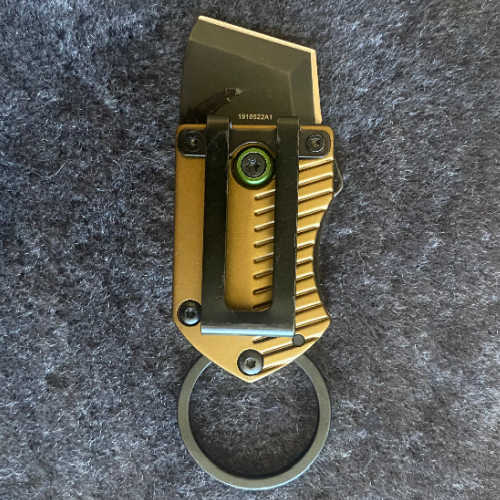
During use the knife felt solid with a decent detent and lock-up and minimal blade play (although how much leverage could you possibly have at the end of a 1″ blade…).
My main gripe at this stage was actually the opening of the knife. It’s got a little flipping nub on the back which really is only useful to add a bit of extra force in getting the blade out (which takes two hands). I tried for quite a while to flip it open and wasn’t even successful. Maybe my blade was tighter than others but I simply couldn’t generate enough inertia with that tiny blade to get it open and locked.
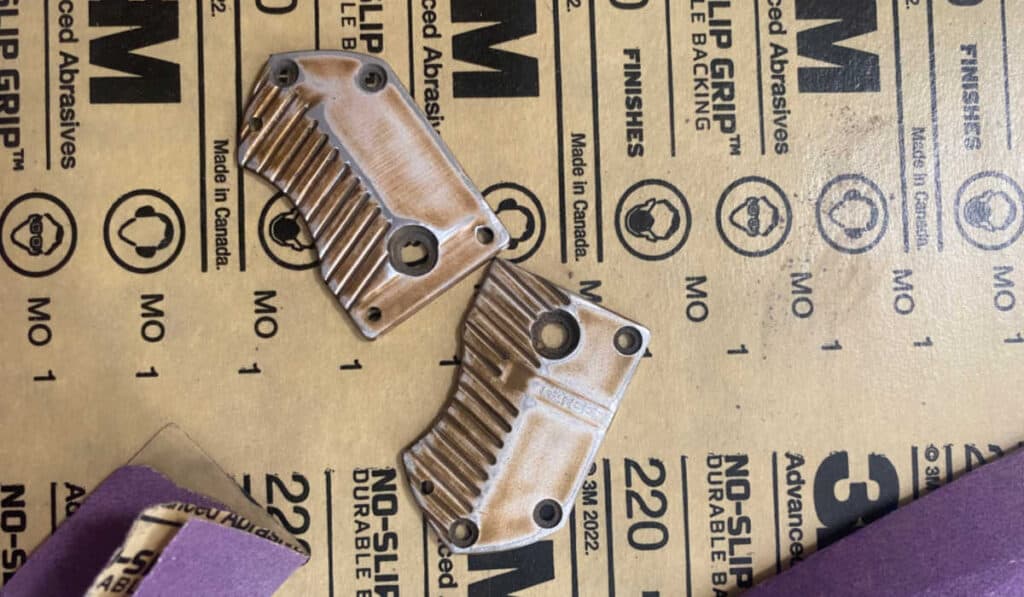
So, after a couple of days, it’s obviously time to take it apart and see how its guts look.
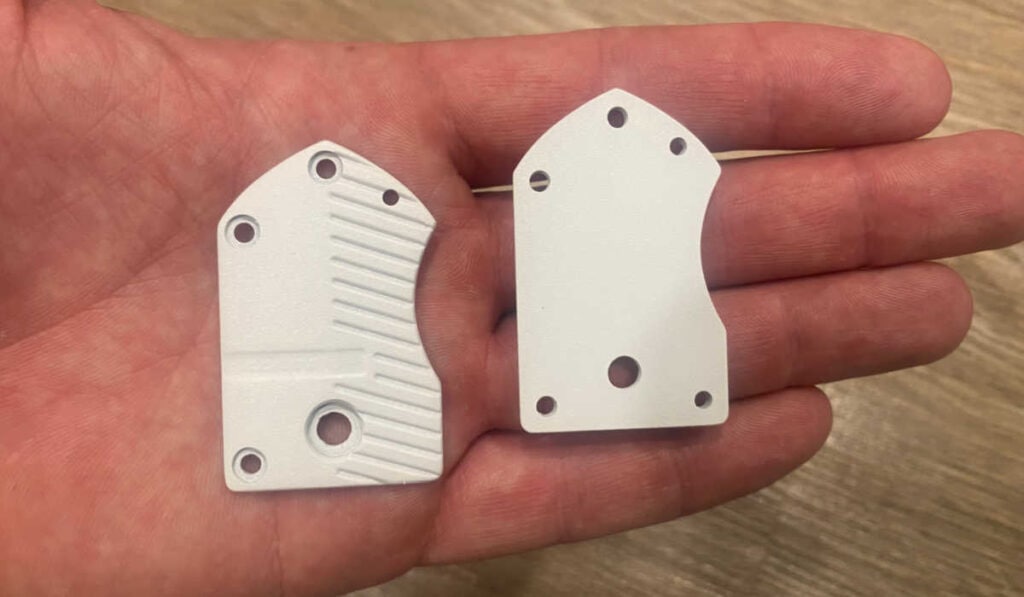
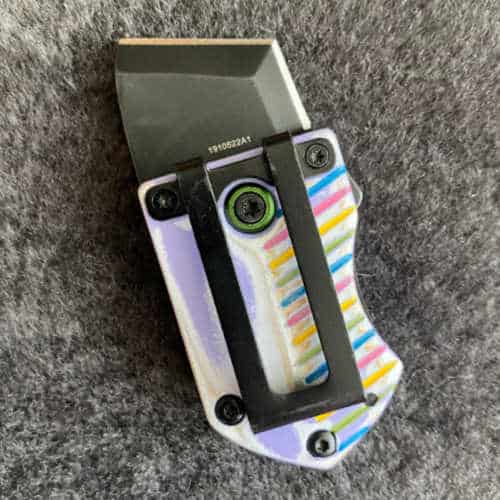
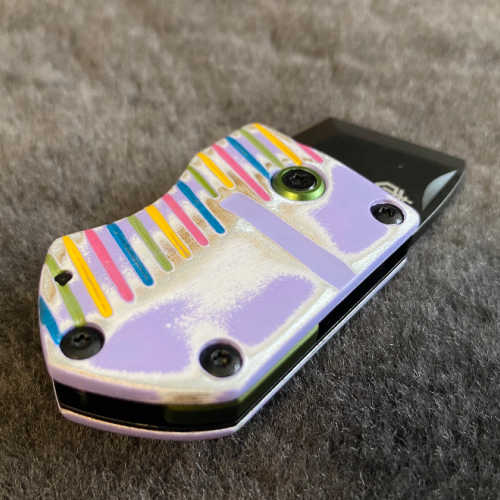
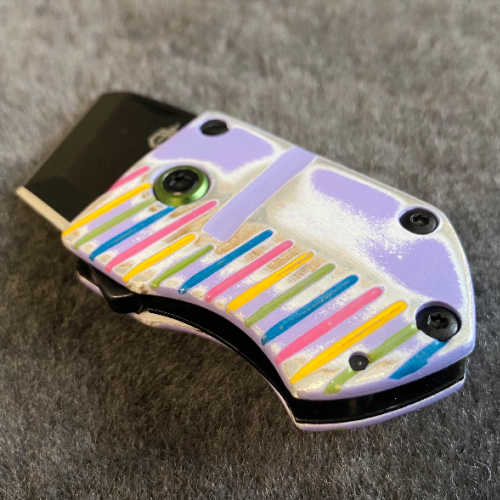
Also, I actually got this knife to paint as a custom gift for my wife so let’s ruin this knife’s classic tactical look while we’re at it!
Disassembly Impressions

Disassembly was straightforward. If you’re new to working on knives then this is about as simple as they get.
The inside was about what I’d expect from a knife in this price range and the overall machine and finishing work was pretty average.
Repainting & Reassembly
My wife had recently made the comment that she wanted a keychain knife but didn’t want anything to austere or tactical so I decided to simply put lipstick on this pig and dress it up like a cupcake.
Painting Aluminum Scales
Contrary to what you’ll read in many places, aluminum knife scales are quite easy to paint. In fact, they’re far easier to paint than something like G10 or other synthetic scales.
While my method isn’t perfect (it didn’t need to be more the finished look) here’s an idea of what you’re in for if you want to repaint the scales or handle on an aluminum knife.
1. Sanding
I ripped the old coating off both front and back using 220-grit sandpaper. You don’t need to take everything off, just rough it up pretty well and remove the old excess.
After sanding I used some compressed air to blow off any chunks and cleaned up the scales (first with soap and water then with mineral spirits) before letting them dry for paint.
2. Priming
If you want your paint to stick, the most important part is to use a self-etching primer. While it may be a bit overkill if you properly prepped the metal…I didn’t. So I got a can of spray aluminum primer in flat white from Home Depot.
In addition to helping the actual paint stick, I wanted to smooth out the knife and prevent any of the old color from showing through.
For a larger/flatter surface area, I would have waited for the primer to dry, sanded, and then applied another coat for a more perfect finish but since I was trying to get this whole project done within a couple of days I did two coats about 15 minutes apart.
3. Sprayed & Painted
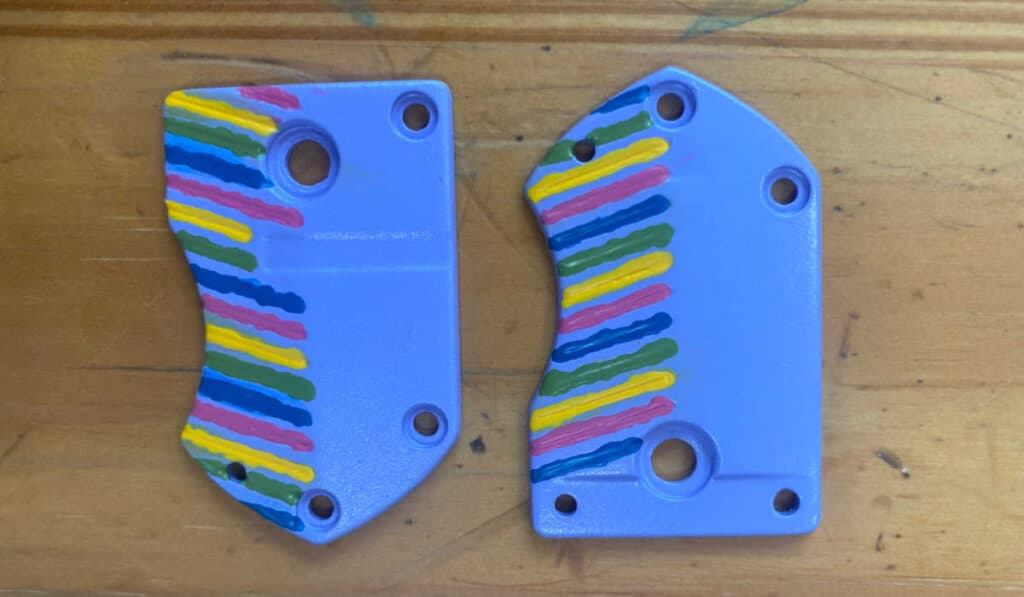
After the primer was dry I spared the whole thing with lilac purple enamel and painted the lines with acrylic (by hand, I know it’s not pretty but this knife is so small…).
I had hoped for more pastel colors but I just went with what I had laying around. Done is better than perfect and I didn’t want to buy $30 of paint for a $30 knife.
4. Distressing
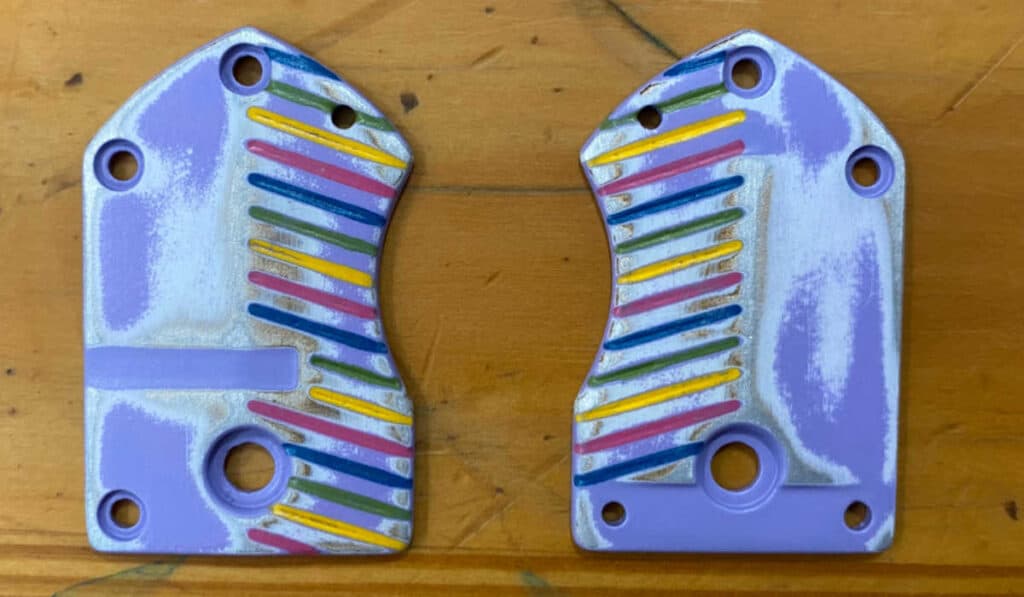
The zombie cupcake vibe is complete.
As you can see, I didn’t even mask off the holes or take any extra precautions. After sanding and cleaning I put 3 coats of matte clear over the whole thing to prevent any paint loss or corrosion.
(Yes, it looks like rust in parts but that’s just the old paint showing through).
Time to put it back together!
5. Reassembly
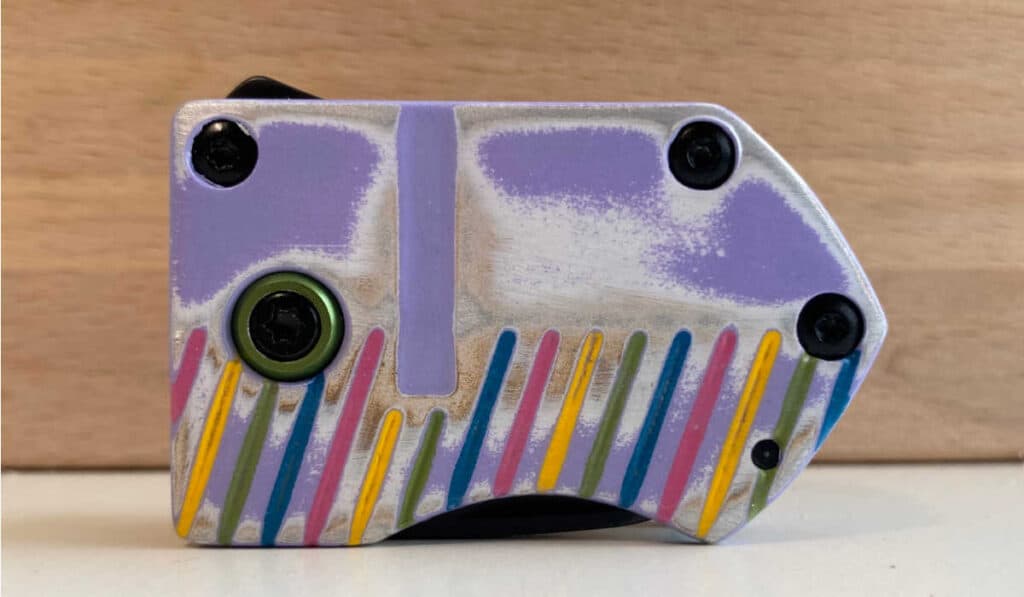
The knife went back together easily and, with a bit of cleaning and better oil, it opened more smoothly (and with less effort) than it ever did before.
6. Finished Project
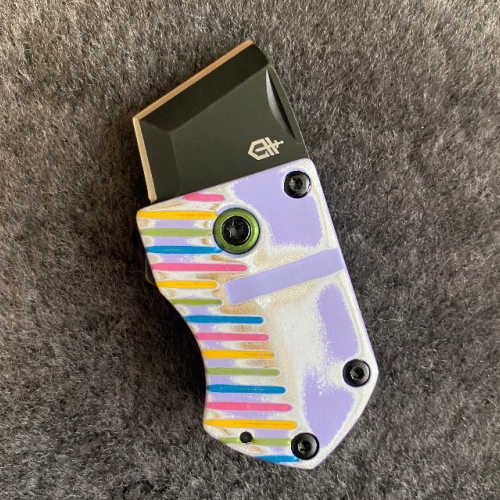
Whether you love it or not (spoiler…it’s not really my favorite…) it’s back together and it’s unique! My wife loves it and everyone that sees it thinks it’s cute which I assume is what she wanted.
Carrying & Daily Use
After carrying it for a couple of weeks I’d be surprised if this knife has left my wife’s purse more than a dozen times.
However, she has been pleased with it when she gets the chance to use it and there have been way fewer times I’ve had to get out my own knife when we’re in the car and she needs to open something, etc.
Conclusion
All in all, the Key Note is a unique little knife that’s fun to keep around. If you don’t have a knife with you all the time (you probably should…) the Key Note is a decent option to keep on your desk in in your car.
I personally haven’t bought one for myself after gifting this one to my wife but I probably will…unless a stranger-looking knife pops up on my radar anytime soon…
What Is A Santoku Knife? (And When To Use One…)

N690 vs 154CM – Which Makes Better Knives?
Are Butterfly Knives Illegal? (In Which States & Why…)
Elmax vs Magnacut – Battle of the Blade Steels

SG2 vs VG10 Comparison (Which Is The Better Knife Steel?)
Do Sheepsfoot Blades Have A Purpose? (Cuz They’re Ugly…)
As an Amazon Associate I earn from qualifying purchases.